Revamping the look of your home can be as simple as giving your dated wood paneling a fresh coat of paint.
By approaching the task with the right techniques, you can update your space and give it a more contemporary and inviting feel. The best part? You can achieve this transformation without the hefty cost of a complete renovation.
However, to ensure a professional finish, it is crucial to choose the right paint, properly prepare the surface, and use the best techniques for painting over wood.
In this article, I’ll guide you through each step of updating your paneling, from selection to the final stroke.
Keep reading to learn how to turn your wood-paneled room into a modern masterpiece with these expert tips.
Choosing the Right Paint for Your Wood Paneling
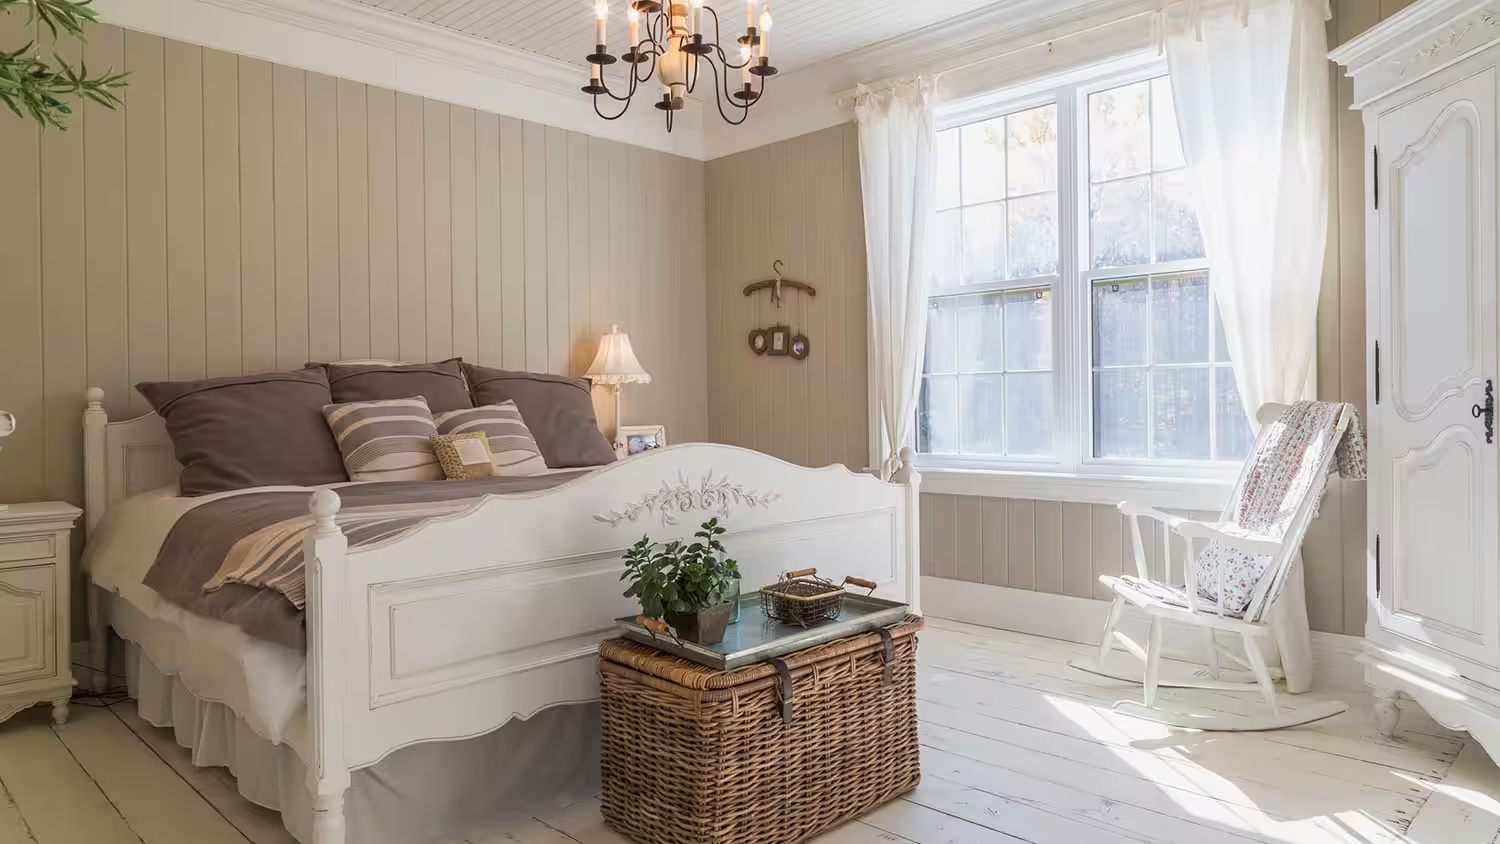
Embarking on a home improvement journey often begins with staring at those wood panels and wondering how to give them a new lease on life.
The choice of paint is a crucial factor that can dramatically transform any room, whether it’s a cozy bedroom or an expansive living room. But before you rush to the hardware store, let’s strategize and make an informed decision.
Before we dive into the painting process, it’s essential to assess the current finish of your wood paneling. This step is critical as it sets the direction for the project, dictating the products and prep work needed for a successful outcome.
Next comes the debate of latex versus oil-based paints—a decision that influences the paint’s durability and the beauty of the finished look.
Considering these considerations, we’re setting the stage to make that wood paneling shine like never before.
Assess the Current Finish of Your Paneling
Peering closely at the wood paneling in my home, I consider the whispers of history held within its grain. Are the panels coated with a glossy varnish, or have they inherited a more matte, natural finish from years gone by? These observations will ground my decision-making as I choose the right hue and the ideal type of paint to enhance the wood’s inherent character.
Detecting signs of wear or a previous stain job speaks volumes about the prep work I must undertake. Suppose the paneling has been bathed in the deep tones of a wood stain or sealed with a heavy-duty polyurethane layer. In that case, my approach will shift, ensuring that the new paint adheres smoothly and highlights, rather than hides, the unique textures of my home’s wooden canvas.
Selecting Between Latex and Oil-Based Paints
My experience has shown me that the decision to use latex or oil-based paint can be pivotal in any painting project. Latex paints are prized for their quick drying times and ease of clean-up with soap and water, making them a favorable choice for weekend warriors looking to transform a room quickly. However, they may not always provide the durability required for high-traffic areas or furniture prone to heavy use.
Conversely, oil-based paints, with their robust finish and resistance to general wear, offer an unmatched level of protection for wood paneling. This type of paint tends to take a bit longer to dry, which means investing more time in the project, but the results can be worth the wait, as it often results in a smoother, more uniform coating that enhances the wood’s natural beauty.
Preparing Your Wood Paneling for Painting
As you embark on the process of painting your wood paneling, remember that proper preparation is the key to a successful and satisfying finish. By taking the time to prepare your surface, you’re setting yourself up for a job well done.
The wood’s surface requires meticulous cleaning and scrupulous examination to address any imperfections that could mar the final appearance.
Initiating this stage, it’s essential to wield a gentle but effective cleaner to remove any dust, oils, and residues.
Subsequently, a close inspection will reveal nicks or cracks requiring a bit of putty and patience to mend.
Once the canvas of wood is pristine and smooth, sanding comes into play, ensuring a base that’s visually appealing and optimal for paint adherence.
This preparation sets the stage, readying the paneling for its transformative coat of paint, destined to enliven the space with renewed vibrancy.
Cleaning Surfaces and Fixing Imperfections
Tackling the essential task of cleaning the wood paneling, I carefully apply a diluted solution of water and mild detergent to the surface using a sponge or soft cloth. Vigilance is key: I ensure that I cleanse every inch, mainly focusing on areas that accumulate grease or show signs of water damage, as these can inhibit paint adhesion.
- Inspect for grimy build-up and water spots
- Gentle cleaning with a mild detergent solution
- Thorough drying to prevent moisture-related issues
After the paneling is spotless, I scrutinize it for imperfections. I identify divots or cracks with an eagle’s eye and fill them with wood filler, smoothing the surface with a scraper. Once dry, a light sanding ensures that my wood paneling is impeccably prepared for a fresh coating.
Sanding the Paneling for a Smooth Base
Armed with a selection of sandpaper, I begin smoothing the paneling. Every stroke is calculated and designed to create a flawlessly smooth base, ensuring the primer and paint apply evenly and adequately to the wood’s surface.
As I wrap my fingers around the sander, I work meticulously over the wood grain, paying particular attention to areas of high contact, like corners and edges. This laborious task pays dividends later, creating a seamless and professional-looking finish that’s utterly satisfying to the eye.
| Step | Action | Tool | Purpose |
|---|---|---|---|
| 1 | Clean the surface | Soft cloth or sponge | Clear debris for smooth sanding |
| 2 | Fill in imperfections | Wood filler | Create an even canvas for sanding |
| 3 | Sand the wood | Sandpaper/Sander | Smooth out the surface for painting |
Step Tool Action Goal 1 Paintbrush/Roller Apply primer evenly Smooth base for painting 2 Brush (for corners) Work primer into crevices Even coverage in intricate areas.
Master the Art of Painting Over Wood Paneling
With every layer of primer meticulously applied and the wood paneling standing primed and patient, it’s time we turn our attention to the actual painting—where technique meets transformation.
It’s a compelling chapter in our home’s narrative, where the right tools dramatically influence the task’s precision, ease, and efficiency.
Our focus lies in a practical decision: Should the trusty brush or the robust roller take the spotlight in the grand pursuit of painting over wood paneling?
This choice impacts the coverage and finish of the paint and dictates the pace and pleasure with which the project progresses.
Each tool has its proponents, and as we discuss further, I’ll delve into the consideration of their virtues, weighing their capabilities in the balance of practicality and perfection.
Brush vs. Roller – Which Tool Wins?
Stepping into the arena with a painter’s poise, I ponder whether to enlist a brush or a roller for this mission. With its meticulous touch, the brush navigates the intricate grooves and crevasses of paneling, ensuring each stroke respects the wood grain’s integrity, a favored ally for detail work and a choice that prizes precision over pace.
Conversely, regarding efficiency, the roller emerges as a formidable contender—its ability to cover vast expanses in uniform swaths is undeniable. Opting for the roller could mean the difference between a day-long endeavor and a multi-weekend project without compromising on the even application crucial for a flawless finish.
H31:
H31: Tactful Techniques for Top-Notch Painting
As I dive brush-first into painting over the wood paneling, I weigh my options. With its broader stroke, the roller guarantees quick coverage but can often struggle to reach into the wood’s natural grooves. Conversely, while it may take longer, a fine-tipped brush allows for unparalleled precision, ensuring every contour of the paneling is coated with care and preserving the integrity of the wood grain—a detail that does not escape the discerning eye.
Ultimately, the technique that triumphs is a synergy between tools, a blend of roller efficiency and brush detail. The roller leaps ahead, swiftly covering large stretches of flat surface with paint. Once complete, I follow up with a brush to finesse edges and crevices, ensuring every inch of the paneling is treated with the respect it deserves. This dual strategy ensures a stellar, professional-grade finish, marrying speed with meticulous attention.
| Area | Tool | Action | Outcome |
|---|---|---|---|
| Flat Surfaces | Roller | Quickly apply paint | Efficient coverage |
| Grooves & Edges | Brush | Detailing work | Precision in hard-to-reach areas |
H21:
The essence of home transformation is encapsulated by painting wood paneling. In this process, not only is color changed, but the atmosphere and mood of space are redefined: Once dated, these paneled walls can become contemporary canvases that reflect your personal style and breathe new life into your home.
As I approach this project, I’m fueled by the knowledge that the result will refresh the look of my home and elevate its overall aesthetic. Through careful planning and execution, applying a fresh coat of paint to wood paneling can yield a stunning transformation, attesting to the power of a painter’s touch to innovate within the interior design landscape.
Patience is the painter’s virtue: I recognize that the meticulous process of painting wood paneling is not to be rushed. Ideally, it unfolds over a sequence of stages, each critical to ensure the resulting finish boasts both durability and beauty:
- Evaluating the paneling and selecting the right paint type.
- Prepping the surface meticulously through cleaning and sanding.
- Applying a suitable primer to support paint adhesion.
- Strategically painting with both roller and brush for an even coat.
Of all the home improvement tasks I’ve encountered, carefully and precisely painting wood paneling is particularly gratifying. Finalizing this task imbues a room with a renewed spirit and elegance that can only be achieved by embracing the unique character of wood. This commitment to detail underscores our pursuit of perpetual beauty within the sanctuary of a home.
The Best Techniques for a Professional Finish
As I venture further into the realm of painting wood paneling, the finesse of my technique becomes increasingly paramount.
Traversing beyond the rudiments of preparation, I now confront the intricacies of the paint application itself.
Here, the professionalism of the final appearance hinges on judicious assessments and the deft management of application tactics—how many coats of paint will suffice to achieve full coverage without excess, and the precision with which I maintain a wet edge, skillfully avoiding those tell-tale signs of overlap that can mar an otherwise flawless finish.
Determining How Many Coats Are Needed
As I embark on the final phase of painting wood paneling, I’m faced with an essential puzzle: the number of coats necessary to achieve that rich, seamless finish I aim for. A single coat can betray the presence of the grain and imperfections underneath. At the same time, too many layers can lead to an undesirable texture and potentially obscure the intricate details of the paneling.
As a rule, after applying the primer, I’ve learned that two coats of paint typically strike the perfect balance between coverage and aesthetics. This approach, honed from my years of painting, ensures that the wood paneling is well-stressed and manageable, resulting in a professional and lasting finish that aligns with my commitment to customer satisfaction and quality of service.
Maintaining a Wet Edge to Avoid Overlaps
Achieving a professional-looking finish on wood paneling is all about technique, particularly when maintaining a wet edge. This crucial step ensures that each paint stroke blends seamlessly with the next, preventing unsightly lap marks. By working methodically and keeping the edge of my painted area moist, I can effectively manipulate the paint to create a unified appearance that enhances the room’s aesthetic.
Maintaining a wet edge requires a careful balance of speed and precision: too slow and the paint dries; too fast and the quality suffers. My strategy involves a steady, efficient pace, allowing enough time to correctly apply the paint while always keeping an eye on keeping the edge wet. This focused approach will enable me to deliver a smooth, consistent finish to the wood panels that speak volumes of attention to detail and dedication to craft.:
- Paint in sections to manage wet edges effectively.
- Utilize a systematic approach to maintain quality and speed.
- Keep an eye on the painted area’s edge to ensure it doesn’t dry out.
Add Character With Decorative Finishing Touches
Once the transformative layer of paint has been smoothed over the wood paneling, it’s time to accentuate the fresh canvas with decorative finishing touches. Implementing detailing techniques such as glazing or distressing can impart an extra layer of sophistication or rustic charm to your renovated space.
Embellishing the paneling with trims or molding can further elevate a room’s elegance. It carves out architectural interest and adds depth to the overall design, shaping the character of your newly painted walls.
Decorative finishes like stenciling or applying a faux bois technique can also introduce a unique flair. These artistic strokes create a visual intrigue that stands out, making the walls not just a backdrop but a statement feature of the home:
| Decorative Technique | Application Tool | Effect |
|---|---|---|
| Glazing | Sponge/Rag | Subtle, dimensional sheen |
| Distressing | Sandpaper/Steel Wool | Aged, vintage appeal |
| Trim/Molding | Nail Gun/Adhesive | Added architectural interest |
| Stenciling | Stencils/Paintbrush | Patterned design accents |
| Faux Bois | Graining Tool | Wood imitation effect |
When finalizing the paneling project, remember the strategic placement of lighting to accentuate your painting efforts. Whether choosing the right ambient lighting to showcase the walls or adding directional lights to highlight a specific texture, the right lighting can magnify the beauty of your handiwork and transform the feel of a room.
Painting wood paneling is a transformative process that revitalizes a room by updating the color and enhancing the ambiance.
Proper preparation, including thorough cleaning and sanding, ensures the paint adheres well and accentuates the wood’s beauty.
Selecting the right tools and techniques, like balancing brushes and rollers, contributes to achieving a professional-grade finish.
Decorative finishing touches and strategic lighting can highlight the new features, elevating the entire space to reflect your style and add character to your home.